
This is so easy - you have to try it!
Greek Yogurt with Pineapple (recipe adapted from Tasty Kitchen)
Heat 2 quarts (8 cups) milk to 180 degrees (I guessed - I don't have a candy thermometer) stirring frequently. It took about 15 minutes. Cover and cool to about 116 degrees (I cooled it til I could stick my finger in it and not scream, lol).
Remove 2 cups of milk to a bowl and whisk in 4T plain yogurt. Whisk that back into the rest of the milk. Put in container and cover tightly; let sit in a warm place for 6-8 hours (I sit mine out overnight) to thicken. Once thickened, place in refrigerator for 4 hours. Remove and strain - mine sat in the fridge straining, fine cloth over a colander sitting over a large bowl - 5 hours to overnight, until desired consistency.
Add desired fruit/whatever to it - I used a few tablespoons of crushed pineapple in juice (not syrup - I have a massive sweet tooth but I don't like sugary things). The only thing I will do differently next time is to drain the pineapple a bit first, it thinned out the yogurt a bit because I didn't. It is also delicious with cut up, slightly overripe peaches, or blueberries ... or just about any other fruit. Try granola on top too!
Monday, August 30, 2010
Tuesday, August 24, 2010
Together Tuesday: Forever Sand Castles
As the summer season draws to a close, fashion some forever sand castles to keep a bit of summer all year round.
Mix up a batch of sand dough … you will need a good amount of playground sand or beach sand and some white glue. Mix the white glue into a bowl of sand, only a tablespoon at a time, until you get a moldable consistency. You can add a little flour to the mixture if it is still too sticky. Work on waxed paper for ease of drying and moving your sculptures later on. Work the sand mixture into sand castle shapes and allow them to dry thoroughly. Add small shells and/or other accents before the sand mixture dries for added fun.
(From Earth*School: Under the Sea, all rights reserved. Copyright Earth*School/Bonnie Vontz 2004 - 2010)
Monday, August 23, 2010
Monday Munchies: Strawberry Lime Sorbet
No ice cream maker needed!
Strawberry Lime Sorbet in Dark Chocolate Bowls (recipe adapted from Tasty Kitchen)
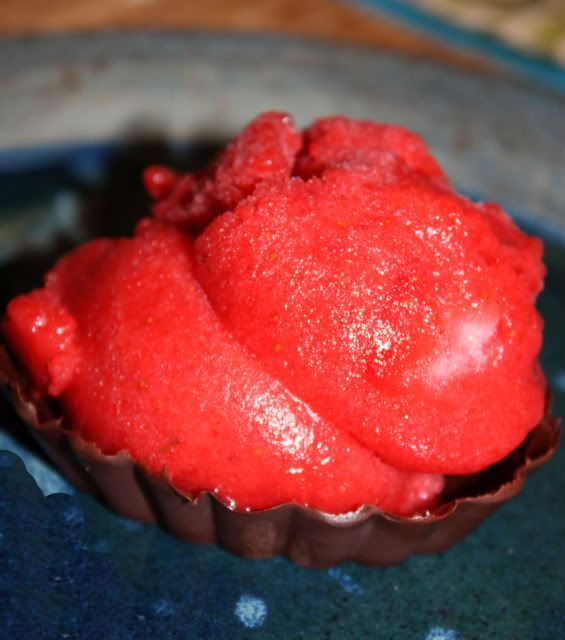
In a food processor, puree one 16 ounce bag of frozen strawberries (partially thawed) and 4T limeade concentrate. (Adjust the limeade to your taste - ours was TART!). Put in a container with lid and freeze for a few hours.
To make chocolate bowls, melt chocolate chips (I used semi-sweet - I would usually use dark, but because I used no sugar in the sorbet, I used semi-sweet to offset the tartness). Coat the bottom and sides of either a chocolate bowl mold or a paper cupcake liner (sprayed with cooking spray). Quick and easy way to do this is to pour melted chocolate in the molds/liners, let set for a couple of minutes on the counter, then pour out excess chocolate. Refrigerate to set.
To serve, unmold or remove paper from chocolate bowl and scoop in two scoops of sorbet.
Once the chocolate bowls were gone, I semi-defrosted the sorbet, added some semi-sweet chocolate chips, mixed and refroze.
Wednesday, August 18, 2010

Tuesday, August 17, 2010
Together Tuesday: Magic Mud
Magic mud is another favorite activity here – but very messy!! Pour a box of corn starch into a large Tupperware or similar bowl. Add 1 cup of water. Mix it up with your hands – it will be at the same time a liquid and a solid. When you try to pick it up it will act as a solid but once you get it in your hands it will run out of your fingers like a liquid. On one side of the container, add a few drops of blue food coloring or kool aid mix and mix. On the other side, add a few drops of yellow food coloring or kool aid mix and mix. Then play with the magic mud (also called oobleck) and watch it slowly turn to green. Play with colors by using different colors of kool aid or food coloring.
Monday, August 16, 2010
Monday Munchies: Homemade Soft Cheese
I've been on a dairy product kick this summer - homemade soft cheese, cheese spread, creme fraiche, Greek yogurt, mascarpone ... it is all amazingly easy to make at home!
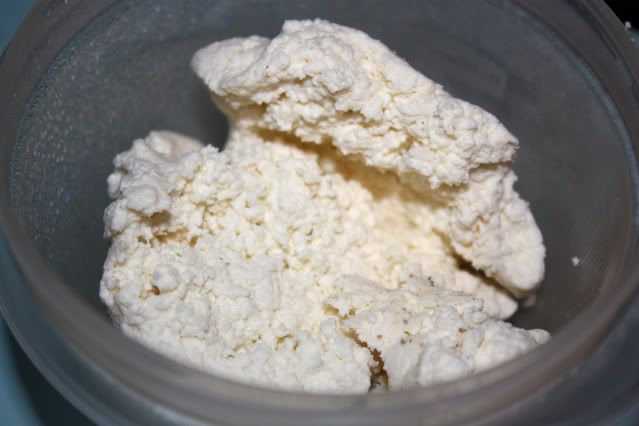
Soft Cheese (recipe from Tasty Kitchen)
* 8 cups Whole Milk
* 1 cup Heavy Whipping Cream
* ½ teaspoons Salt
* 3 Tablespoons Fresh Squeezed Lime Juice (or lemon juice, vinegar ... whatever acid you prefer)
Prepare a sieve lined with fine mesh cheesecloth and place it over a large bowl; set aside. Into a large stockpot, add milk, cream and salt and bring to a rolling boil, stirring constantly. When it has reached a rolling boil, add lime juice, reduce heat and stir until mixture curdles. Pour the mixture into the sieve and allow it to sit approximately 1 hour to drain and cool.
Discard liquid in the bottom bowl. Place sieve into the refrigerator to chill for a minimum of two hours. Once chilled, transfer cheese to an airtight container and keep refrigerated.
Pic is plain cheese - which is really yummy. I am adding herbs to half of it to eat on crackers
Soft Cheese (recipe from Tasty Kitchen)

* 8 cups Whole Milk
* 1 cup Heavy Whipping Cream
* ½ teaspoons Salt
* 3 Tablespoons Fresh Squeezed Lime Juice (or lemon juice, vinegar ... whatever acid you prefer)
Prepare a sieve lined with fine mesh cheesecloth and place it over a large bowl; set aside. Into a large stockpot, add milk, cream and salt and bring to a rolling boil, stirring constantly. When it has reached a rolling boil, add lime juice, reduce heat and stir until mixture curdles. Pour the mixture into the sieve and allow it to sit approximately 1 hour to drain and cool.
Discard liquid in the bottom bowl. Place sieve into the refrigerator to chill for a minimum of two hours. Once chilled, transfer cheese to an airtight container and keep refrigerated.
Pic is plain cheese - which is really yummy. I am adding herbs to half of it to eat on crackers
Wednesday, August 11, 2010

Tuesday, August 10, 2010
Together Tuesday: Lemon Ice Dough
This sparkling lemon ice dough is sure to please any play dough enthusiast! It has diamond dust to make it sparkle like ice, as well as a pleasing lemon scent and color. A great way to spice up a hot summer afternoon!
Ingredients: 3 c flour 3 c water
1 ½ c salt 2 T oil
1 T cream of tarter 2 packets lemonade Kool Aid
Yellow food coloring for more color, if desired
Diamond dust (sparkly iridescent glitter)
Directions:
1. Mix the kool aid into the water.
2. Mix all ingredients together in a saucepan over medium-low to medium heat until the dough starts to pull away from the sides of the pan and becomes hard to stir.
3. Remove from heat and knead (let cool enough to touch) on a floured surface until the dough is a nice consistency.
4. Store in an airtight container.
(From Earth*School: Rainbow of Colors, all rights reserved. Copyright Earth*School/Bonnie Vontz 2004 - 2010)
Monday, August 9, 2010
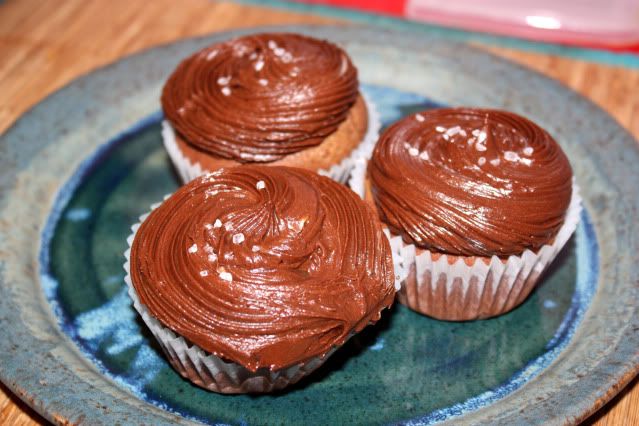
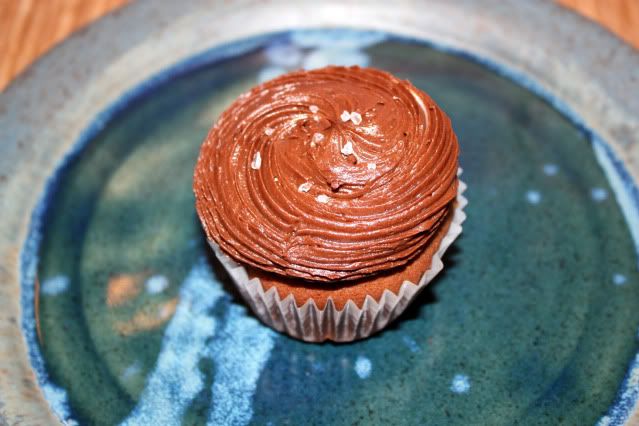
Monday Munchies: Fluer de Sel Cupcakes
If you like dark chocolate ... caramel ... or sweet and salty combinations, make these today. Right now. Go on ... I mean it!
Chocolate cupcake recipe (cupcake and chocolate frosting recipes are from Tasty Kitchen)
Preheat oven to 400 F.
Cream 2 sticks butter and 1 1/4 c sugar. Add 2 eggs one at a time, mixing after each addition.
Dissolve 2t baking soda in 1 cup buttermilk. Alternate additions of flour (2 1/ cups) and buttermilk, beginning and ending with flour.
Add 2t vanilla. Melt the 2 ounces dark chocolate, cool and stir into the batter. Before you add the chocolate, eat some of the batter - it is the best batter I have ever had. I am a huge chocoholic, but I considered stopping before adding the chocolate and just making them this way. I have made then without the chocolate several times now as well, and they are to die for!
Pour into cupcake wrappers and bake at 400 F for 20 minutes. Makes about 2 dozen cupcakes
Chocolate buttercream frosting:
Cream 1 stick butter. Add 4 cups powdered sugar, 1/4t salt, 1t vanilla, 1 cup cocoa and about 1/2 cup milk. put in pastry bag fitted with a large star tip.
Caramel filling:
The original recipe I used called for a caramel sauce recipe which I made and hated and promptly threw away and made my own, lol. This is my favorite caramel recipe:
In a heavy saucepan, melt 2 sticks butter. Add 1 can sweetened condensed milk, 1 cup corn syrup, 4c + 4T dark brown sugar and mix thoroughly. Heat to boiling, then stir constantly, heating to soft ball stage. I heated this to just under so that it would not harden as much in the cupcakes.
Remove from heat and add 1T vanilla. Cool til you can handle it without getting burned, then fill a pastry bag with large tip with it.
Fill each cupcake with caramel by inserting the tip into the top of the cupcake and giving a generous squeeze. Frost cupcakes with chocolate buttercream. Garnish with a small sprinkle of sea salt on top.

Tuesday, August 3, 2010
Together Tuesday: Jellyfish Flyers
Jellyfish flyers
For this activity you will need 2 circles of clear contact paper, some string, a hole punch and various colors of tissue paper. Cut some of the tissue paper into strips to use as the jelly fish tentacles; tear the rest into small pieces to decorate the jelly fish body. Remove the backing from one of the contact paper circles. Attach the tentacles to the bottom half of the circle. Use the torn tissue paper pieces to decorate the rest of the jelly fish’s body. Cover with the other tissue paper circle. Punch a hole in the top and thread the string though, tying tightly. Bring your jelly fish flyer outside or out to the beach to fly like a kite!
(From Earth*School: Under the Sea, all rights reserved. Copyright Earth*School/Bonnie Vontz 2004 - 2010)
Monday, August 2, 2010
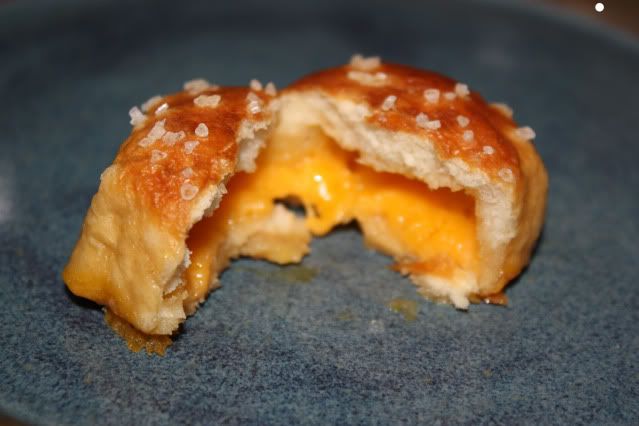
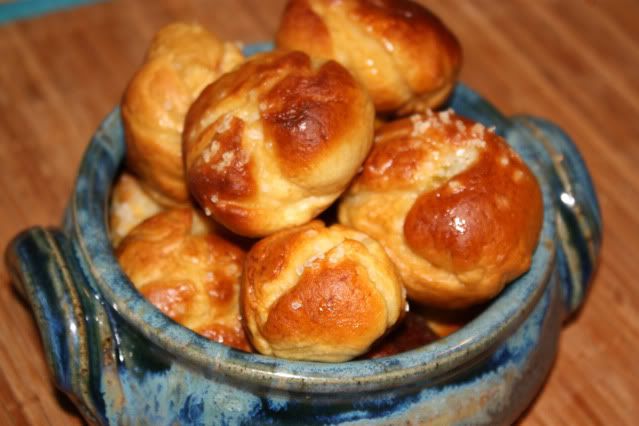
Monday Munchies: Stuffed Pretzels
Cheddar Stuffed Pretzels - way easier than you think!
Sprinkle 1T yeast in 1/2c warm water. Let sit 5 minutes til frothy. Add 1/2c milk, 2T packed brown sugar, 2T butter (softened), 1/2t salt, 3 1/4c flour and mix to form dough ball. Knead 10 minutes til satiny/tacky (I stick it in the kitchen aid and go do something else)
Put dough in a greased bowl and let rise at least 1 hour, til doubled in size.
At this point, make your pretzels. You can make traditional pretzel shapes, pretzel sticks, etc. I always go for pretzel bites. Roll little balls of dough - super easy. Cut small blocks of cheese (I used seriously sharp cheddar; asiago is my personal favorite but we were out). Press your thumb in each dough ball and insert cheese. Cover cheese with dough.
Put on greased baking sheet and let sit 15 minutes.
Heat up water with about 1/4c baking soda. Dip pretzels for about a minute on each side and remove to the greased baking sheet. Be sure not to leave these in the baking soda bath too long or the cheese will start to melt. Brush with an egg wash and sprinkle on sea salt. Bake at 400 for about 12-15 minutes.

Subscribe to:
Posts (Atom)


